Showing posts with label design. Show all posts

Tuesday, 29 January 2013

Crazy butterfly...

For those of you also doing the Bead Journal Project or the Crazy Quilting Project this year I imagine that the design element is both the hardest bit and the most fun... it certainly is for me!
January is my design/ layout and gathering month, finding the beads, fabrics etc to work with. This January has been no different... I've been collecting beads and lace, and now I finally have the design laid out and the templates cut.


I'm going for a much less involved design this year, last year's beading project was a zodiac/ wiccan visual reference aid, and very detailed with tons of information. Because this year's project is based on a crazy quilt I don't think that it will work as a teaching aid, it will be far too busy. 
I've chosen a butterfly, I doodle them alot and it will be nice to do one in a different media. It really lends itself to blocks of crazy quilting. Each section will be a blend of  similar coloured fabrics, lace and beads.

Scale has been fun.. the original design is on A4, so it will give you an idea of how big it will be...


...but then the sections need to be reasonable or the crazy quilting will look silly!  Can't wait to get going now... but I'm still waiting on that fabric to turn up so I can ice dye the background. That promises to be great fun considering the way my snow dyeing adventure went!  Come on postie!!


Friday, 21 December 2012

Spoonflower fabrics

Woohoo! I'd been toying with turning some of my artwork into fabric so I can make truly unique bags, not just by design but with the fabrics too. I joined up with Spoonflower and uploaded some of my work. It's pretty easy to do and I hope it will be worth the expense.. you have to buy a swatch before it can be printed in quantity... 
I picked one of my abstract series, which began as a pastel spiral, and was then worked in a few favourite software programs and filters. Sets seem to work best, especially if I'm quilting, you need a variety of depth and pattern. 
So here is my first swatch

Not bad, I like how they've come out... and the base cotton is not too thin. I'm thinking of using these in a crazy quilt, they're only 8 x 8" squares so not big enough to start making bags... but now I know the design works I can play with the scale of each pattern and get what I need. 
If you have artwork that would translate into a pattern why not take a look at Spoonflower and get your own original prints!


Saturday, 8 December 2012

Christmas Pressie Rucksack

Lol, I'm making good headway with the pre-xmas creativity... Last week I started another rucksack, with a personal theme this time. I have photo canvas that runs though a printer so I chose a few relevant photos, funked them up a little with my favourite software and printed them out as features on the flap.
I used the same process for the bag as in my tutorial in the how-to section, adding pockets, loops etc before joining the base, then bodies together. Every now and again I have a eureka moment and find a new little trick to make it quicker, stronger or easier so I should do an update for the tutorial too.
This is an upcycled bag too! The canvas is actual artist canvas that has been worked on- it was an enormous piece but it cuts up beautifully into little abstract pieces. It sews beautifully too, strong but flexible.


Here's a closeup of  the flap, I love adding and adding the bits, watching it buildup into a little work of art, I never start with a plan, I let the design develop as it will... 


As you can see the owner to be is a horsy girl, with a thing for cats too... she doesn't know this is coming, I'm just sad to know I won't see her face when she opens it...
Just putting the finishing touches to it now...


Sunday, 28 October 2012

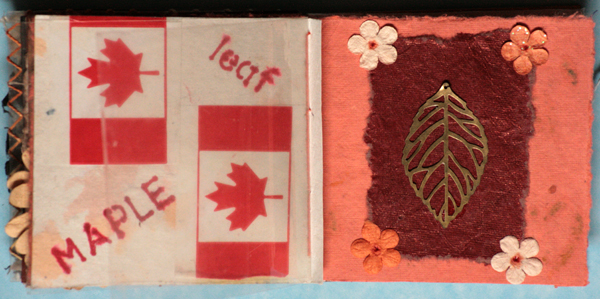
Creating a Book of Leaves

Last month Ruth began a prompt in our Hinges group on Milliande's to create a book of Leaves using a coptic binding technique. It's a very simple and effective technique and we've added some great little books into the discussion.
Here's mine so far- it's not filled up yet, but not too far to go. I've used a few techniques and am having fun...

The cover is a 3mm layer of plaster on MDF. I've scratched into the plaster and washed it with acrylics, added a few pics, then waxed over the whole thing. I drilled the holes before painting.

This is the endpage so far. I used several different papers to give me some variation in work... Leaves is an ink doodle highlighted with pencils.

The text is by an unknown author, but it resonated with me so I've used it over stamped texts and swirls. The leaf is a cutout with 2 pages stuck together and a bit of colour added.

This double-spread is an ink drawing, highlighted with coloured pencils.

Another unknown author, but given the time of year I thought it highly appropriate, and fun! Written in ink and highlighted with coloured pencils. The image is a tracing of a brassy leaf charm I have.

As I was working on the book an ATC arrived from Barbara in Canada, so I had to find a quick use for the funky tape she'd used... sometimes simple is just best! The brassy leaf used previously highlighted on a bronzy textured paper.

A printed paper is used as a background for an embossed and painted pattern on foil. I love macro so had to create a cellular pic of a leaf using copics and pencils.

Try as I might I cannot improve with my calligraphy. I love using it, but hate my writing... this is a well used quote by Camos, but I like it so have added to the long list of users.... Inked text over stamped texts and florals. Embellished with a paper flower rather than use a word, trying to add a new element.

More doodling... I love hearts and they can very easily be adapted into leaves. Coloured with copics.

There are a few more that I've not taken a pic of yet... collage and acetate windows... and a few more to fill up... so I'll update when I've done some more. 
Maybe you'll take a look at the prompt and have a go? If you want a similarly easy book to make take  a look at my tutorial here. Have fun and let me know how you get on!!


Tuesday, 25 September 2012

Rucksack heaven!!

Oh, I finished it today, so it's had a bit of a road-test and performed brilliantly!! It's so comfy and fun... I might just put a bit of velcro in the inside pockets though, just to stop stuff falling out if I threw the bag around- well- it will happen at some point!

Here it is finished...


I've really enjoyed making this but I'm not sure if I would be able to justify charging £70/80 for it, even though it's taken 3 whole days to make because of the work involved... we shall see, I might list one on Etsy as a "special order" and see how it goes...
The tutorial is completed over in the how-to's textiles section. Have a go... post me a pic... any questions just email me- I'll go through it with you if you're stuck! 


Related Posts Plugin for WordPress, Blogger...