Showing posts with label book. Show all posts

Monday, 22 April 2013

Butterflies, butterflies

  I know, I know, too long again! I'm going to have to set certain times to write my blog otherwise I'm just not going to keep up enough. I have been busy, always my excuse! 
  For those of you that know me, aside from working in rainbows alot I also tend towards purple... and use butterflies as a theme regularly, well I've found out this week that I'm not on my own. I've had orders for my collage textile journals, both purple with butterflies- wonderful, as I know my stash is full of suitable goodies.
  Without giving away my trade secret for construction here's one of the finished journals, all sent off and happily received

I've started to add little art canvases of my work too, just as an extra dimension, I know they're each unique anyway, but this makes them more so- I love making these journals!

Here's another one, a small Moleskine I made at the same time for the fun of it, I've listed it on Etsy now.


Now I need to finish the latest order... hope I get my machine back soon, after 7 months it's gone stupid and gone back to the shop, darn! 


Friday, 1 February 2013

13 days to go...if you do Valentine's Day

  If you celebrate Valentine's Day, that is!  We don't at my house, but I still get caught up in the flow with everybody else's creative exploits in a red and hearty fashion...
  My very obliging friend Mary sent me some die cut hearts to show me what sizes were available for cutting grey board... and of course I had to do something hearty and romantic- not my strong point, so be gentle!
  Mary cut from corrugated board, so I thought I'd tissue and gesso it up to give it a bit of support and to add some texture. Using a technique that I've been playing with alot lately I added flowers, butterflies and sequins with gesso, and heated it to bubble it.


  Once it was suitably dried out I painted it up to give depth and shadow  and highlighted it with those gorgeous Golden irridescent acrylics- you can't see it in the pic, but when you twist the books they shimmer with 2 colours in places. 
  When my Cinch arrived I'd already bought a pair of wires but not used them, so I cut them down to use for these... not sure I've got the hang of the squashing yet... I was expecting grooves or something to show how to place the book/ wires so they folded correctly. I think I need to play more... or carry on with the coils that I have an abundance of.
  I spent this morning cutting pages and lightly inked the edges before punching  with my Big Bite. That's both new xmas toys being put to good use already, I'm sure they're going to get a serious workout over the year!

  So, thankyou Mary for your help, and the next lot winging their way to me... now I know which die to save up for.


Oh, and while I was distracted on another hearty woolly project I had theses sitting in latex so I can make some hanging plaques in plaster. It's all about developing... so you'll see them soon!

Friday, 11 January 2013

Bookmaking fun...revisited

It was some time ago that I made a concertina book after a prompt in the Hinges group on Milliande's. The plan was to turn it into a family photo album- hence the specific stencilling on the canvas covers... that was so long ago!
As part of my "Finish up 2012 projects" campaign I sat down and finished it- woohoo! As it is a present for a family member that we've not seen before 2005 the photos are really about the kids growing up...
Here it is finished


There is a tutorial to make the book over on the How to's... Books page if you'd like to have a go. It's a beautiful little book and so versatile- you can use it for any personal story. Why not have a go?


Thursday, 8 November 2012

Teeny Tiny Twinchie Books

My latest book project has come about courtesy of Sonja's swap over on Milliandes. She loves recycling so that is the theme for this book.
I wanted to try something new so I spent some time going through my books and opted for a Jacob's ladder style with 3 sections. It looks straight forward, but my is it fiddly! 
For my recycle theme I chose "natural and man-made", I use alot of both types of materials so have lots of both stashed away. I keep a jar by my sewing machine that I put my cut threads in and thought this was the perfect time to use a few. Liquitex make a very versatile, and fun, medium especially for pouring. It dries clear and flexible and is perfect for so many projects (I also use it for all my collage, gluing and waterproofing) I laid out several layers of threads and poured the medium over until the piece was thick enough and fully soaked. Then left it to dry overnight. It will peel very nicely off glass and smooth plastic!
While it was drying I gathered some other suitable bits and bobs, and one material I was determined to use was a lovely piece of recycled plastic from my friend Carmina. It is fused plastic bags.. and so versatile.


Here's how one side turned out... the threads hardened beautifully, and although it is flexible the threads and small size render it quite robust. The fused plastics were folded and reheated to double the thickness, but I still needed 2 layers to make the page. I added some elements symbolic of nature and technology to balance the theme. 

Add a little handmade paper and a band from leftover bits and there you have it, a complete recycled booklet. 
I doubt I'll attempt a tutorial for the book, it's quite a fiddly exercise, and with more pages it would be even harder to portray... so I'll leave you to have a look online, or try a copy Alisa Golden's Handmade Books which is what I followed. I might take a deep breath and try a longer one! Just not today...


Sunday, 28 October 2012

Creating a Book of Leaves

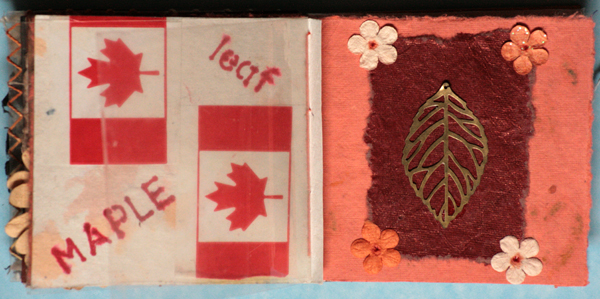
Last month Ruth began a prompt in our Hinges group on Milliande's to create a book of Leaves using a coptic binding technique. It's a very simple and effective technique and we've added some great little books into the discussion.
Here's mine so far- it's not filled up yet, but not too far to go. I've used a few techniques and am having fun...

The cover is a 3mm layer of plaster on MDF. I've scratched into the plaster and washed it with acrylics, added a few pics, then waxed over the whole thing. I drilled the holes before painting.

This is the endpage so far. I used several different papers to give me some variation in work... Leaves is an ink doodle highlighted with pencils.

The text is by an unknown author, but it resonated with me so I've used it over stamped texts and swirls. The leaf is a cutout with 2 pages stuck together and a bit of colour added.

This double-spread is an ink drawing, highlighted with coloured pencils.

Another unknown author, but given the time of year I thought it highly appropriate, and fun! Written in ink and highlighted with coloured pencils. The image is a tracing of a brassy leaf charm I have.

As I was working on the book an ATC arrived from Barbara in Canada, so I had to find a quick use for the funky tape she'd used... sometimes simple is just best! The brassy leaf used previously highlighted on a bronzy textured paper.

A printed paper is used as a background for an embossed and painted pattern on foil. I love macro so had to create a cellular pic of a leaf using copics and pencils.

Try as I might I cannot improve with my calligraphy. I love using it, but hate my writing... this is a well used quote by Camos, but I like it so have added to the long list of users.... Inked text over stamped texts and florals. Embellished with a paper flower rather than use a word, trying to add a new element.

More doodling... I love hearts and they can very easily be adapted into leaves. Coloured with copics.

There are a few more that I've not taken a pic of yet... collage and acetate windows... and a few more to fill up... so I'll update when I've done some more. 
Maybe you'll take a look at the prompt and have a go? If you want a similarly easy book to make take  a look at my tutorial here. Have fun and let me know how you get on!!


Sunday, 10 June 2012

Book covers in 3D

That's my weekend finished with bubbled gesso projects. I was determined to do  couple that could be used as book covers so while using the same technique I chose different accents... 
here they are-


I shall find some nice papers now and bind them into books for sale. I might even get them onto Etsy- I've been planning putting work on for sooooo long, but just not looking forward to writing all the texts.

I've also taken lots of pics through the stages, and have posted a tutorial in the Craft section.

Tuesday, 5 June 2012

Twinchie books- so sweet!

My good friend Sonja is hosting her first swap for these cute little two inch booklets... I've never made books this tiny so had to give it a go... especially as I had spent last Tuesday marbling cotton and some papers to stock up.
I wasn't going to make three, I only needed two for the swap, but they turned out so cute I made a spare for me to keep, and I shall be making some more to give to friends.


They were simple to create, make rectangle covers slightly bigger than the 1.5 x 2" pages, decorate and add ribbon. Sew the pages in place adding beads on the outside. Sew in end pages and then glue them to the fabric covers. Press for a while so they dry flat... and enjoy! These don't have anything in them, but I may add some text and images before I send them off. 


If you fancy receiving one of these why not join Sonja's swap and have some fun making your own too!
.

Thursday, 31 May 2012

Super fast bookmarks

When I was cutting up the card as the inserts for my rainbow book  I ended up with lots of thin strips left over.... never one to throw away....


There's recycling... and hoarding... I do both... much to hubby's annoyance... but I found a use for the strips...


How simple to make; punch holes, fit eyelet, cut wool then doodle on each one... I now have a supply of bookmarks for RAAKs (Random Acts of Arty Kindness/ Happy Mail)... it's a shame UK postage has just doubled! There's a few birthdays this month...

Tuesday, 8 May 2012

Bookmaking Adventure...

More books.... we have a fair coming up at our local cat sanctuary... so I thought I'd make a few topical sketchbooks, in my usual manner with beaded signatures. Instead of using my collaged textiles I bought preprinted fabric and wadding for the fronts...


I printed one of my doodles on the end page to give the owner something to do if they are bored!

Saturday, 14 April 2012

Bookmaking Adventure...

Ruth posted a new challenge over on Milliande's The Hinges group, the theme for April is Japanese stab bound books. I've had a look at some and thought it would be perfect for a reference book I want to create. Similar to my Zodiac wallhanging, I want to compile info on colours and their associations- chakras, crystals, healing, moods etc... and rather than keep looking in many books I want it all easy to hand, specific to me.
It's taken 2 days so far, but the book is finished... now I just have to compile the info I want, do some texts and sketches and she's a done deal!
I shall put a tutorial over in the how-to's books  section- I've just edited the pics...


The cover is collaged textiles, the inserts are sponged watercolour paper separated with tissue paper. Card is folded, punched, eyeletted and threaded to create info sheets which will stand alone for ease.
I can see me making more like this...

Wednesday, 29 February 2012

Bookmaking...part deux

You might remember the little squashy book I made for January's prompt, I posted a tutorial in the how-to's books section above. It was great fun and will be a little photo album pressie...
This month February's   prompt was posted for an accordian/ concertina book. I've just finished mine and will post the tutorial shortly in the book section, but I couldn't wait to post it now!
I'm doing a zodiac wall hanging, and with my memory being so appalling I get fed up of getting my books out to check on the signs/dates etc, so I decided to use this as a small reminder to help me out.
Here's how it turned out...

Finished book covers and ties

Symbols and names, shall be adding dates etc...

Saturday, 4 February 2012

BOS adventure continues....

It's been a lovely couple of days... sitting with piles of paper, beads,gel and ribbon up to my elbows around me, I'm totally- literally- immersed in my bookmaking!
Having finished the cover, which I decided to make rather than a whole book, simply because I know I'll fill these up quickly and I'd like to keep the same cover for a while.. (maybe a new one each year as work continues) rather than spend all this time creating it and needing a new one in a few months! 
So yesterday I worked on the section headers, the front page and dedication pages etc.


 I also managed to get some better pics in daylight....


 I'm happy with the outside now...so onto the insides...

  The front pocket and endpage. I saved lots of birch bark over the last few years  and loved including it in the book. I also used the soft lino cut I did a few days back to make an embossing for the centre.


 The first few pages are inked and are for my dedication, goals, index etc....


 In my many hours of searching and learning I came across some rather nice backgrounds, which I'm sorry to say I can't refind to add a link (thankfully I'd saved the PDF's as I found them) . Being me I didn't want to use them as unchanged pages, I always add my own work, so I collaged them with some lovely textured heavy papers.


This is how they are all laid out. I inked and stamped the titles the same as the front pages. The main area will be for detailed indexes...


Now I need to get all my notes together and start to add them in... and begin the long journey...
Can't wait, but am kinda nervous too!! Having spent so long making it just right, I don't want to mess it up... and I'd better dedicate it first.... Oh, just thought, I need to add a feather in there somewhere... a work in progress indeed!!

Materials used;
Felt, leather, ribbons, angelina, brass beads, silver beads, semi-precious crystals, cord, wool, bone,bark, vinyl, plastic, papers, cards, inks, stamps, book pages, wire and probably a few things I've forgotten!


Thursday, 1 December 2011

Sketchbook fun

I'm still working on my textiled sketchbooks, my current creations are A5, I'm finding that's both a nice size to work, and a reasonable size for sketching.
As well as creating these for sale, several of them will be going to unsuspecting friends for christmas, I can't wait to see their faces when they open them!


This is one of my favourites, spirals and blues. 72 pages of artist quality cartridge paper, yummy, I shall have to make one for myself  after the xmas rush. Here are a few of the others...A5's and A6's


Related Posts Plugin for WordPress, Blogger...