Monday 30 January 2012

Playing with lino...

I desperately wanted to make some stamps for several projects, and I can't find gel packs for making stamps at a reasonable price anymore, so needed an alternative.
I've lino cut before but it hurts my hands now so wanted something a bit easier to cut. A friend suggested "Easy carve" so I had a look online. My regular art shop actually had some small circles in, which saved me time and postage..woohoo! - once I decide on a project I NEED to get on with it!
So I spent yesterday cutting out symbols in the circular lino. It is almost rubbery and it is very difficult to get pencil or pen to draw on it, so accuracy with design can be a problem... even Sharpies didn't work!
Despite that, and working virtually freehand, I managed to get close enough to what I wanted... well, these things are supposed to be "irregular and personal" aren't they? If they were precision cut I may as well have bought them...
So here they are, my first 10.... I have more to do, and you can buy it in a sheet so I can get some bigger designs cut too, which will help for my calendar for next year.


Even with the drawing issue, they were quite nice to work with, and alot easier to carve than tradition hessian lino, so I would recommend them.
I've just tested them out on my Valentine ATC envelopes and they print ok too, if you use a brayer rather than an acrylic block (like normal rubber stamps)
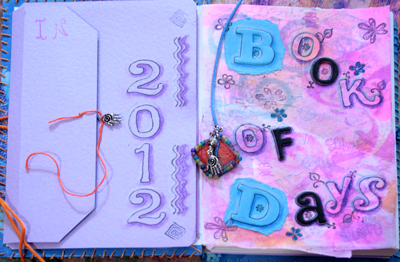
The one thing I didn't think of though, doh!, was reversal... so my 2012 stamp is only good for embossing.... and with my new Bigshot I'm putting it to good use already- they emboss beautifully too. These little gems will be doing alot of work in the near future.
xx


Sunday 29 January 2012

Aquarius bead block for BJP 2012

Well, I finally buckled down to beading my first block for the Bead Journal Project this year. I'd designed my wall hanging earlier, but not begun designing the beaded elements...
Once I got going it didn't take long to come up with a set of designs which I thought would be blocky enough to work in beads... but I'm sad to say my first attempt looked awful, no definition and with all the bling there was just not enough contrast between object and background. So I had to retry, this is the second attempt (the 1st attempt is over on my BJP-2012 page )

Aquarius second attempt

 I used delicas, bugles, hex, teardrops and huge seedbeads on felt. I'm still not happy with this- I thought the design might have worked better, so I'm looking at redesigning all 12- or only beading a section of it, but having seen some of the entrants on BJP already I'd feel lazy if it wasn't fairly well covered in beads rather than silks. Best get my thinking cap on before the end of February when I'll need to post my Feb effort on the BJP 2012 Blogsite

Thursday 26 January 2012

Valentine's Day is on it's way...early!

I know, it's over 2 weeks away, but with post taking a fair while between countries, we have to make these things early....
 a couple of weeks ago we badgered Marilyn, bless her for agreeing, into hosting her first swap - My Valentine ATC's . She's doing a great job and alot of us have joined in. I wasn't sure quite what I was going to do...felt, plastic, paint, foil..... 
I decided today to use watercolour paper and my watercolour pencils, I hardly use them so it was a good reason to get them back out. After creating a background I got my inks, stamps and stencils out and had a play with no preconceived ideas. I had offcuts of organza in a box with cut out hearts, so I used that too. Once dried I added a tiny bit of doodling on a few... and here they are.... all ready to go.


Now I just need to decide who gets which card and post them off... hopefully in time for the big day!

Monday 23 January 2012

Fun with Botany

I've just finished photographing my swaps for Palma's Botanical matchbox swap ... I wasn't sure whether to do some of my botanical painting, or mix it up a bit... but as it is a completely new experience for me I went with the mixing it up a bit!!
I used this template  for the matchbox... and googled matchboxes to get some ideas as to how they are usually decorated...
I wanted to do something really funky as well, and as I'm not really vintage or steampunky I don't have much in the way of suitable embellishments for those styles. I did think a pop-up box would be fun though, and as I'm not allowed to send natural materials to Oz I felt a fake tree was in order!! I know how you love trees Mel!
I cut my boxes, little base inserts, found some pen springs, and dug into my wire and crystal collection.... the results being 3 little landscapes, complete with river, flowers and overhanging tree... wish I could find a small enough fairy to pop in there too...

Blues

Golds

Greens
These are for Mel, Dawna and Susan, but I'm not going to say who's is who's... that'll have to be the suprise! xx

Friday 20 January 2012

Book of Days journal

Well, I simply had to do it, saw it and couldn't resist!!
I came across the Book Of Days 2012 project and thought it would be good for me too, with Milliande's Seed journal project exploring my potential and attitudes, this will go some way to consolidating my self-analysis and healing processes. So looking forward to it this year, it's something I keep putting off.
Now I'm making books on a regular basis I decided to use one of my already made signature sets and just make the covers...
So here's the finished (maybe) journal and opening pages. The covers are mixed media (rather than my usual textile/embroidered ones) because I wanted to really build up the layers and interest in a different way for a change.
Covers, collaged papers, netting,wool,perspex,inks, leaves and beads

Title page and envelope, alcohol inks, pastels,stamps,embossed letters,charms,silks,sharpies

The back page has an envelope too, for things I want to forget/throw out/release from 2011. Now I just need to go through the videos and catch up a bit on prompts.
It's a free project, so pop over and have a look, it promises to be great fun, judging by the comments of those who started on day 1!!

I've added the process in the how-to's- books section in case anyone fancies trying one for themselves.
.

Wednesday 18 January 2012

Felt artpin fun...

Morning!
I'm just catching up taking pics of the last few days projects.... one of my favourites has been the Artpin swap hosted by Joy and Dawna. I've not made these before, but I guess alot of what I do could be converted into badges/brooches as long as I firm up the backs.
There are some gorgeous examples posted in the swap already, but I wanted to make something using different materials so there's always a variety when receiving them.
I started with a base of left-over wet felt, added merino tops by dry felting. I then embroidered shapes and knots in contrasting and complimentary colours. Embellishments added were angelina, brads and buttons.
I made 6, but only 3 are being swapped, so I'll have 3 to use in later projects- book fronts, textiles, collages...


I really hope whoever gets them likes them...

Monday 16 January 2012

!00th Spiral in the 366 Spiral Project

Good grief- has it come round already??
I started the 366 Spirals Project 100 days ago, that's 100 spirals  of  my artwork, photos and creations.
I never realised I had quite so many tucked away in all my work, but the challenge will be to find 266 more!
Not only that, but it's the actual passing of time- 3 months+! Where has it gone? I must have blinked and lost a month. Time is so precious- I am so glad and thankful that I get to spend so much of it doing what I love most- being creative.

This is my chosen pic for the 100th- 2 pieces commissioned for weddings; a spiral heart tiara and a feather heart spiral brooch; two pieces that I loved creating, and know that they were loved by others too, and also went some way to making a special celebration even more unique and personal.


To see the 99 other original artworks, photos and creations  please follow this link
Thankyou for looking!

Saturday 14 January 2012

Be the Seed and Seed Wings

I still have  a couple of prompts to catch up on, but here are my pieces for the Be the Seed and Seed wings prompts at Milliande's Seed Journal Project;

Humming Sycamore, ink wash and technical pen

A = Allium, ink wash,technical and gel pen

Be the seed, ink wash and technical pen


inks wash and technical pen

Throughout the year I also want to work through the alphabet of my favourite seeds, I've started with allium...
.

Friday 13 January 2012

Seed Journal 2012

Milliande started this prompt Seed Journal 2012 earlier in the New Year, but as you know I've been busy playing on other projects....
But , true to form I did sneak a day off to make my journal cover, first with the fimo seeds, and then to paste,etch and later ink the front. I quite like it in the white too...

white fimo and modelling paste on canvas
 But I had to colour it to make it right...

finished with acrylic inks and matt varnish 

It might keep me inspired to pick it up often, inbetween a multitude of other projects.


Tuesday 10 January 2012

Little Faces- part deux

Well, I decided to go ahead and make more faces, once I'd neatened up the rough patches a bit. They are not exactly what I wanted, but to get the project underway I really need to have the faces ready so these will do for this project. I will be making more feminine ones later!!


As my reusable moulding rubber is at my studio, and the weather's too yuccy for me to walk down there, I've decided to try the alginate compound instead- I've had it for so long, but never got round to using it- just like the resin plaster which will also be used up in this experiment. (Yet one more justification for my super- stash of materials and equipment that is labelled "hoarding" by my hubby!)
I'll be adding the process in the How to's- craft section. It's not too messy, given that it's plaster, but I would recommend doing it in the kitchen- it's hard to get out of carpet- oops!  

So here are the next stage of my army of faces.... at least these will be easier to refine than cooked fimo.


As I made up extra in the first batch I also plastered some MDF tiles which I had been meaning to do for a long while. These will be carved into, built up on, painted, sprayed and waxed, at some point! The hearts were also a little forethought- I have a small project in mind for them too....


Friday 6 January 2012

Little faces....

Or should that be the small faces? Blast from the past there...

In preparation for my Bead Journal Project I've been playing with ideas...zodiac seems to be the recurring idea, but I rather fancy creating a hanging of  a zodiac wheel that also incorporates the pagan festivals and crystals etc associated with each sign/moon phase...  I quite liked the idea of little faces in the centre of the beadwork, which will be my uptake on each sign...so I've been playing with fimo- not had that out in a while. Luckily I had some stashed away....
So here are todays endeavours
heart faces, glass bead eyes

round face, glass bead eyes
round face, sleeping


Oval face, glass bead eyes

Not bad for first attempts...it's so difficult getting it smooth this small- the biggest is the oval, 1 3/4" high- I will have to give them a light sand later to buff the rough bits off. I don't like drawing or painting faces, I'm not that good at them, seems I have a similar issue with cabs too. These were all supposed to be femine, ethereal and serene, not jesters and Benny Hill. Still, I have time to improve, and decide if they will be centres or not- if I can't get them prettier I might have to rethink the plan.

The beginning of expression....

Thursday 5 January 2012

Folding Book Project

Well, it's January 2012 so the first prompt for The Hinges book-making adventure  was posted by Ruth and Dawna. I only saw the post this morning and thought it would be perfect for a birthday pressie for a relative who hasn't got any pics of our branch of the family. 
I'd been prepping for a batch of birthday cards and covers so had an armful of materials at the ready... so I ended up doing it straight away... naughty me, considering I hadn't finished the fabric cards yet- tch tch! I took some pics along the way, so if they come out okay I will post a tutorial for you to follow.
Here's how it's turned out so far.... I need to print out the photos before I can go any further with embellishments


My daughter squealed "that's so cute" when she walked in, so I can see me having to make several more!! No great hardship- so much fun.

I've now posted a tutorial in the how-tosbooks section. Have a go and enjoy!! Don't forget to send me a pic!! xx

2012 Here we go....

Phew! So thankful xmas is over and things are getting back to normal. I do so hate the commercialism of it all nowadays and for the past few years I've been trying to get back to a quieter, healthier, less stressful holiday. Which is just as well given the hospital episode last year, and another scare this New Year...
So my new years resolutions this year are going to be;

Monitor my meds, lose weight and improve my lung capacity again
Get back into the outside world and do more fairs/shows and events again
When the gallery is refurbished make sure someone is there to help me run it this time
Do bigger 3D projects again
Try to set up an Etsy store and inventory all my stock already created- so much!!!
Find time to sit with my family and make the most of it- time could very quickly run out. 
Keep up with my little online swaps and friends...

I hope that's not too much to plan for, so much depends on my health and ability to get out... but I'll give it my best shot....


Related Posts Plugin for WordPress, Blogger...